- Published on
How to build and use Zig packages


I've been using zig for a short period of time and one of the first things I wanted to do was install a package. Zig is a relatively new language and to my surprise had released the official package manager quite recently. There are some tutorials and references that helped me understand how this all works but I wanted to make this as simple as possible for someone new to zig. It wouldn't be a complete video without referencing articles from Ed Yu. These were very helpful to get an introduction to the concepts. But sometimes the best way to learn is to go and do it yourself.
In this article I'll walk through two things:
- How to build a package
- And then, how to install a package, or rather, how to add a package as a dependency
How to build a package
When it comes to building or writing your own package there are many different things you might want to include in your package. Things like:
- code you've written (your library)
- artifacts
- static files
I'm going to cover how to build a package that includes code you've written. The articles from Ed Yu cover how to include artifacts and static files.
Step 1 - Create a github repository
Self explanatory
Step 2 - Create a zig project
In a terminal run the zig command to create a starting project
zig init-exe
Step 3 - Write your code
This is all up to you but for simplicity make sure you have a main.zig file as that is the file that will be included in the package. Of course, you can customise this but let's keep it simple.
Step 4 - Write a build.zig.zon file
In your project base folder create a build.zig.zon file. The zig package manager will use this file to configure details about your package, such as the name, version and dependencies.
The syntax is JSON-like:
.{
    .name = "my-package",
    .version = "0.0.1",
    .paths = .{""},
}
Copy the above into your build.zig.zon file and update the name and version to match your project.
Step 5 - Write a build.zig file
The build.zig file will include your code as a module in the build
const std = @import("std");

pub fn build(b: *std.Build) !void {
    const target = b.standardTargetOptions(.{});
    const optimize = b.standardOptimizeOption(.{});

    const dep_opts = .{ .target = target, .optimize = optimize };
    _ = dep_opts;

    _ = b.addModule("zig-llm", .{
        .source_file = .{ .path = "src/main.zig" },
        .dependencies = &.{},
    });
}
Notice here that the source file is src/main.zig. This is the file that will be included in the package. If you change the name of this file you will need to update the build.zig file to match.
Step 6 - Build your package
In a terminal run the following command to build your package
zig build
If your build outputs an error, check the previous steps to make sure you've followed them correctly.
Step 6 - Push your changes and make a release
Push your changes to github and create a release. This will be the version of your package that you can use in other projects.
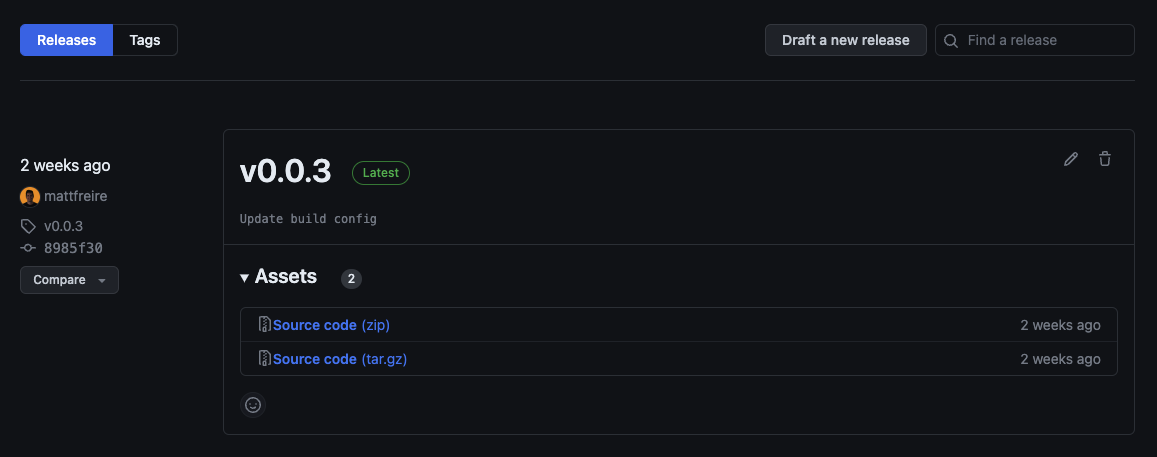
On Github you can create a release by going to the releases screen from your repository:
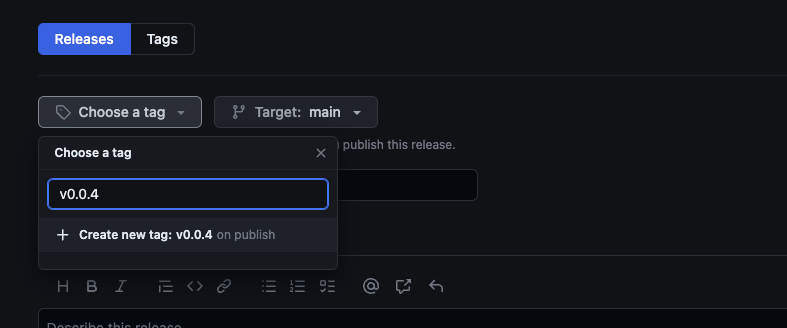
Then click the "Create a new release" button. On the next screen you can enter a new name for your release. In this example I'm creating a new version v0.0.4:
Congratulations! You've created a package. Now let's see how to use it.
Step 7 - Use your package
Now that you've created a release you can use your package in other projects. In this example I'm going to create a new project and add my package as a dependency.
Step 7.1 - Create a new project
In a terminal run the zig command to create a starting project
zig init-exe
Step 7.2 - Add your package as a dependency
In your project base folder create a build.zig.zon file. This time we will specify the dependency of our package.
Ed Yu greatly points out that the easiest way to get the hash of your package is to set the hash value as a random hash value and then run the zig build command. Zig will complain that the hash is incorrect and will output the correct hash. You can then copy the correct hash into your build.zig.zon file.
To make it easier for your users, you could include the hash in the README file of your package.
Here's an example using my package ZigLLM as a dependency:
.{
    .name = "zig-example-use",
    .version = "0.0.1",
    .dependencies = .{
        .zig_llm = .{
            // the url to the release of the module
            .url = "https://github.com/mattfreire/zig-llm/archive/refs/tags/v0.0.3.tar.gz",
            .hash = "1220145cd26ccbbf94dd8c23c4d66acc4fbf56cec2c876592000732ce6b7481278b9",
        },
    },
    .paths = .{""},
}
Now run the zig build command and you should see a quick log of the package being downloaded and built. If the build step fails then zig should tell you that it's because of the hash or URL being incorrect.
Once it builds successfully you can then move to the next step.
Step 7.3 - Add the dependency as a module
Now that you've confirmed your package is being found and downloaded you can add it as a module in your build.zig file.
I'll continue with ZigLLm as an example for completeness. In your build.zig file add the following:
const std = @import("std");

// Although this function looks imperative, note that its job is to
// declaratively construct a build graph that will be executed by an external
// runner.
pub fn build(b: *std.Build) void {
    // Standard target options allows the person running `zig build` to choose
    // what target to build for. Here we do not override the defaults, which
    // means any target is allowed, and the default is native. Other options
    // for restricting supported target set are available.
    const target = b.standardTargetOptions(.{});

    // Standard optimization options allow the person running `zig build` to select
    // between Debug, ReleaseSafe, ReleaseFast, and ReleaseSmall. Here we do not
    // set a preferred release mode, allowing the user to decide how to optimize.
    const optimize = b.standardOptimizeOption(.{});

    const exe = b.addExecutable(.{
        .name = "example",
        // In this case the main source file is merely a path, however, in more
        // complicated build scripts, this could be a generated file.
        .root_source_file = .{ .path = "src/main.zig" },
        .target = target,
        .optimize = optimize,
    });

    //
    //
    // Adding this section
    //
    //
    // using zig-llm as a dependency
    const zig_llm = b.dependency("zig_llm", .{
        .target = target,
        .optimize = optimize,
    });
    // adding it as a module
    exe.addModule("zig-llm", zig_llm.module("zig-llm"));
    //
    //
    //
    //
    //

    // This declares intent for the executable to be installed into the
    // standard location when the user invokes the "install" step (the default
    // step when running `zig build`).
    b.installArtifact(exe);

    // This *creates* a Run step in the build graph, to be executed when another
    // step is evaluated that depends on it. The next line below will establish
    // such a dependency.
    const run_cmd = b.addRunArtifact(exe);

    // By making the run step depend on the install step, it will be run from the
    // installation directory rather than directly from within the cache directory.
    // This is not necessary, however, if the application depends on other installed
    // files, this ensures they will be present and in the expected location.
    run_cmd.step.dependOn(b.getInstallStep());

    // This allows the user to pass arguments to the application in the build
    // command itself, like this: `zig build run -- arg1 arg2 etc`
    if (b.args) |args| {
        run_cmd.addArgs(args);
    }

    // This creates a build step. It will be visible in the `zig build --help` menu,
    // and can be selected like this: `zig build run`
    // This will evaluate the `run` step rather than the default, which is "install".
    const run_step = b.step("run", "Run the app");
    run_step.dependOn(&run_cmd.step);

    // Creates a step for unit testing. This only builds the test executable
    // but does not run it.
    const unit_tests = b.addTest(.{
        .root_source_file = .{ .path = "src/main.zig" },
        .target = target,
        .optimize = optimize,
    });

    const run_unit_tests = b.addRunArtifact(unit_tests);

    // Similar to creating the run step earlier, this exposes a `test` step to
    // the `zig build --help` menu, providing a way for the user to request
    // running the unit tests.
    const test_step = b.step("test", "Run unit tests");
    test_step.dependOn(&run_unit_tests.step);
}
In this build file we've added zig-llm as the name of the module for the zig_llm dependency defined in the build.zig.zon file.
Now you can import the module in your src/main.zig file:
const std = @import("std");
const llm = @import("zig-llm");
const exit = std.os.exit;

pub fn main() !void {
    const alloc = std.heap.page_allocator;
    const env = try std.process.getEnvMap(alloc);

    const api_key = env.get("OPENAI_API_KEY");
    const organization_id = env.get("OPENAI_ORGANIZATION_ID");

    if (api_key == null or organization_id == null) {
        std.log.info("Please set your API key and Organization ID\n", .{});
        exit(1);
    }

    var openai = try llm.OpenAI.init(alloc, api_key.?, organization_id.?);
    defer openai.deinit();

    const models = try openai.get_models();
    std.debug.print("{}", .{models});

    const completion = try openai.completion("gpt-4", "Write a poem", 30, 1, false);
    for (completion.choices) |choice| {
        std.debug.print("Choice:\n {s}", .{choice.message.content});
    }
}
And that's it! You've now created a package and used it as a dependency in another project.